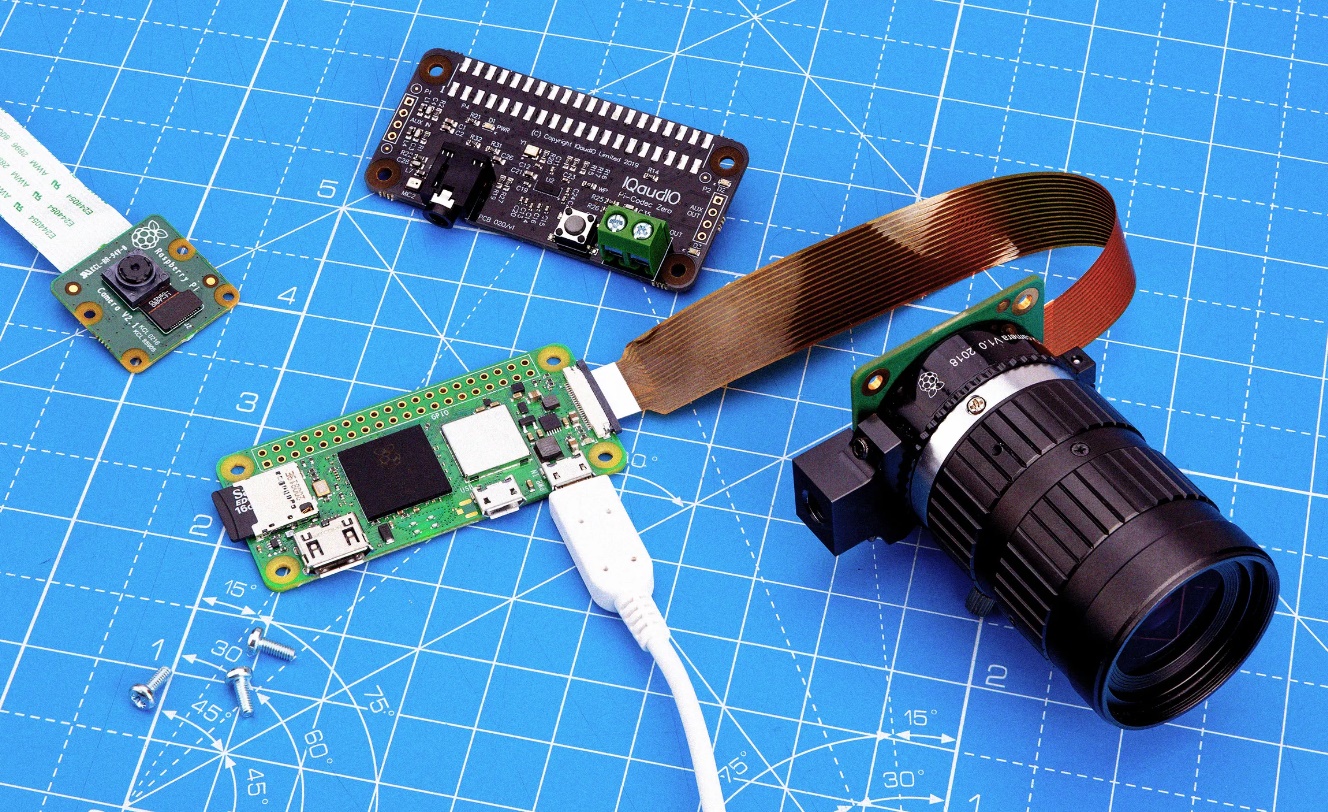
What Is a Raspberry Pi W 2024: How Use Wireless & Bluetooth?
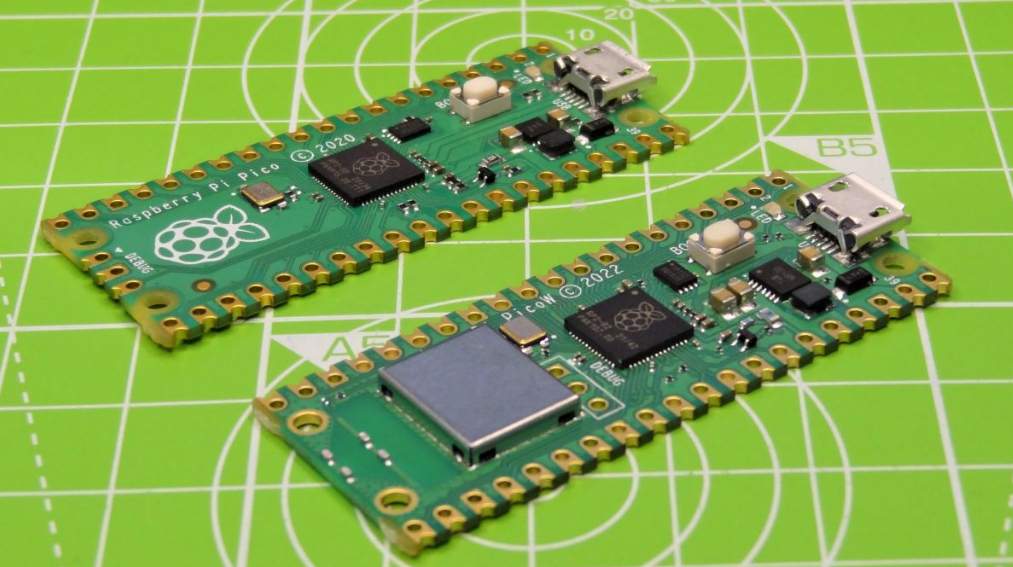
The wireless version of the powerful Pico microcontroller board from Raspberry Pi opens up many possibilities for IoT projects. A Raspberry Pi Pico, like a Raspberry Pi computer, has GPIO pins that can be used to control and receive input from various electronic devices. The Pico zero package is used in the new Introduction to Raspberry—Pi Pico’s path to engage in some creative physical computing projects.
The original Pico, released by Raspberry Pi in January 2023, received a robust, low-cost ($4) microcontroller development board. It is powered by Raspberry Pi’s RP2040 system-on-chip (SoC) and features 2MB of onboard flash storage, 264kB of RA, and 40 pins—including three analogue inputs—the unique Programmable I/O subsystem. One notable omission is the lack of onboard Wi-Fi. The $6 Pico W, available at the end of June 2022, addresses this issue with built-in wireless connectivity. Let’s take a closer look at Pi’s capabilities and applications.
Hardware for the Raspberry Pi W
Aside from adding onboard Wi-Fi, the Pico W board is the same size as the standard Pico. The Pico W is identical to the standard Pico model in specifications. As a result, it should be compatible with all existing Pico add-ons.
| Processor | RP2040 with dual-core Arm Cortex-M0+ @ 133 MHz |
| Memory | 264kB SRAM |
| Storage | 2MB QSPI flash |
| Wi-Fi | 2.4GHz 802.11n wireless LAN |
| Input/Output | 40 x pins, with 26 x multifunctional GPIO (inc. 3 x analog inputs) |
| Interfaces | 2 x I2C, 2 x SPI, 2 x UART, 1x SWD (Serial Wire Debug) |
| Custom Peripherals Support | 8 × Programmable I/O (PIO) state machines |
| Power / Data Connection | Micro USB |
| Dimensions | 21 mm × 51 mm |
Furthermore, as with the standard Pico, a unique Programmable I/O subsystem allows you to customize the I/O interface. In addition to connecting to non-standard peripherals. Independently runs PIO blocks, freeing up the central processor for other tasks, such as rendering composite video.
Because the standard Pico and Pico W boards do not include a male pin header, you must solder on suitable 0.1″ headers. Holding the Pico’s BOOTSEL button while connecting it to a computer via its micro USB port, drag the UF2 file over to it. Check out our Getting Started with MicroPython on Raspberry Pi Pico guide for more information.
Follow the instructions in Raspberry Pi’s connection guide to use Pico W’s wireless capability to connect to your Wi-Fi network in MicroPython or C/C++ (PDF). The network library is used in MicroPythonto to connect to Wi-Fi.
Raspberry Pi W Projects in the Making
So there’s a lot of room for all kinds of IoT projects—for ideas, check out our Arduino IoT projects. Try adding wireless functionality or a web interface to one of these Raspberry Pi Pico projects.
Web Server: The Raspberry Pi Foundation’s step-by-step project guide demonstrates how to convert your Pico W into a web server to control digital outputs from a browser and receive sensor data. Garage Door Sensor: Jeff Geerling’s GitHub project sends data locally to Home Assistant to show whether his garage door is open or closed, which can be viewed on a web dashboard.
Pico W 2 Allows You To Go Wireless.
The Pico W microcontroller development board is the standard Raspberry. Pi Pico is ideal for controlling electronics projects and has a shallow power requirement. But it also includes onboard Wi-Fi connectivity for various exciting IoT projects. However, pico W has a wide range of applications, including adding wireless functionality to control an existing Pico project from a local network or the internet.